How to fix USB when it says this folder is empty
 |
| How to fix USB when it says this folder is empty |
Time to fix out the pendrive issue showing empty even if the drive Is full. This type of problem occurs due to various reasons. However, we are going to share three easy methods that will help you fix Pendrive emtpy problem even when the drive is full. Go through the post to know about it.
any times Windows users face a problem that shows empty Pendrive while the drive is full. This is a very common problem which occurs due to the corruption of memory storage tables in a storage device. This type of problem occurs when users improperly eject Pendrive or external drive or when it is affected by some viruses and malware. However, this can be fixed easily without using any third party tool on your Windows PC. So have a look at complete guide discussed below to proceed.
How To Fix Pen Drive Empty Problem Even The Drive Is Full
The method is straight and simple, and you don’t need any technical knowledge, you just need a simple command entering that will easily fix out the issue of loss of files in Pendrive. Follow the methods discussed below.
#Method 1: New Drive Letter
Sometimes due to some hardware/software issue, our computer fails to recognize the hard drive and even if it does. It might show you some problem like empty USB drive even if the drive is full. So, here Assigning New drive letter might fix your problem and it is an easy task. So, make sure to apply this method first to check whether it’s working or not in your case. If it works, then you don’t need to go through the next methods.
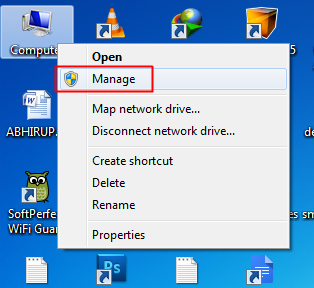
Step 1. First of all, reinsert your USB drive on your computer and then right click on ‘My Computer’ and then click on ‘Manage.’
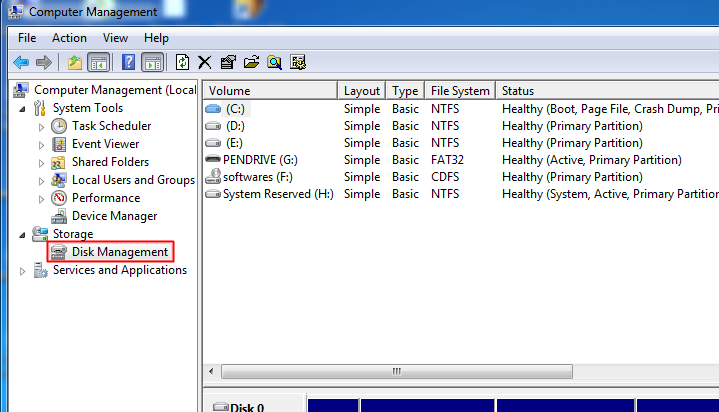
Step 2. Now you will get to see many options in Computer Management. Here you need to select the option ‘Disk Management.’
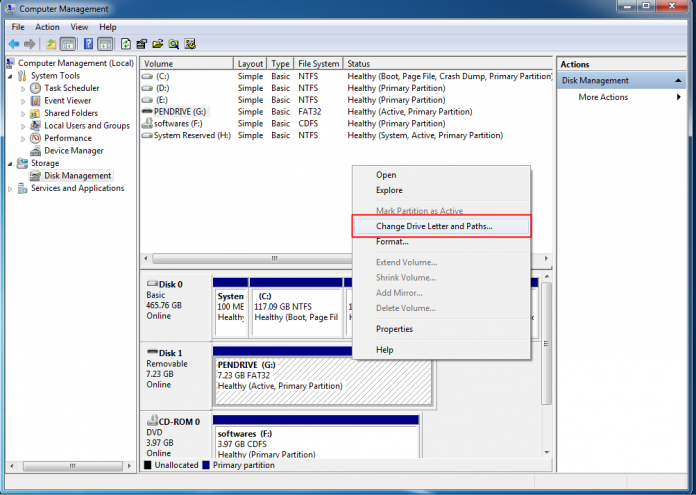
Step 3. Now you need to find your USB drive and then right-click on it and select the option ‘Change Drive Letters and Paths’
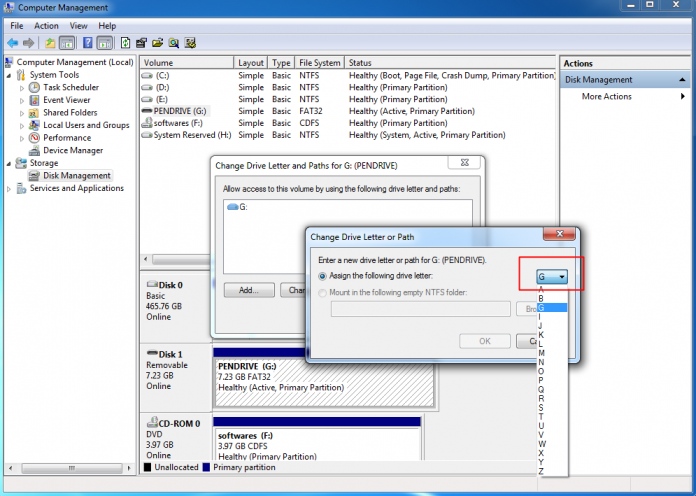
Step 4. Now you will be asked to choose a drive letter or Path. Simply select your drive letter and click ‘Ok’ button.
That’s it! Now remove your USB drive and reinsert it and check whether files inside your USB drive are showing or not. If it still doesn’t show you the file, go through the other methods.
#Method 2: Show Hidden Files In Computer
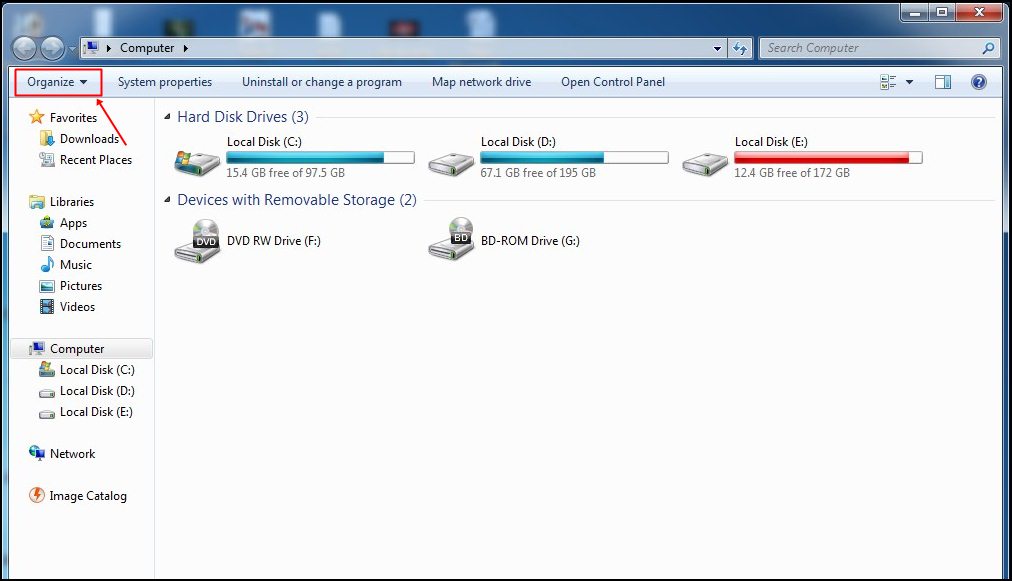
Step 1. First of all, you need to open My Computer and then click on “Organize.”
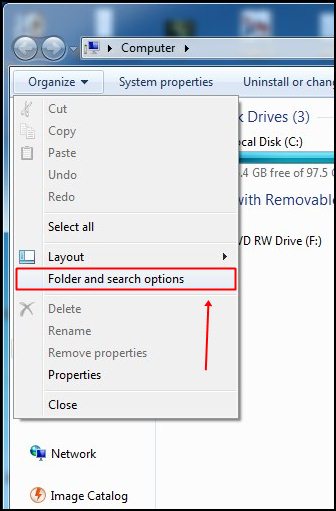
Step 2. Now from the drop down, select “Folder and search option.”
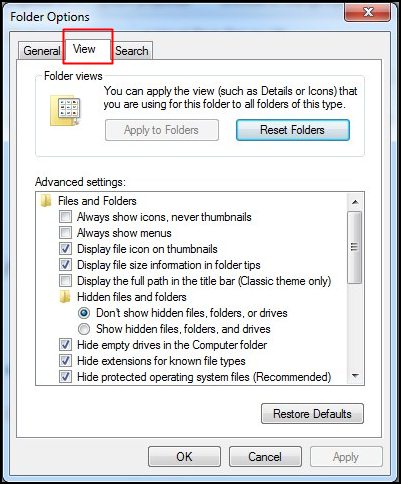
Step 3. Now you need to click on “View” tab which is located just behind the “General” tab.
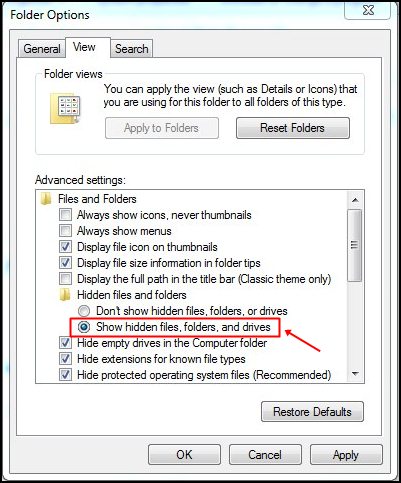
Step 4. Now you need to search for the setting “Hidden Files and Folders” and there select the option “Show hidden files, folders, and drives” and then click on apply.
This method will eventually show your files and folders if it is kept hidden.
# Method 3: Using Command Prompt
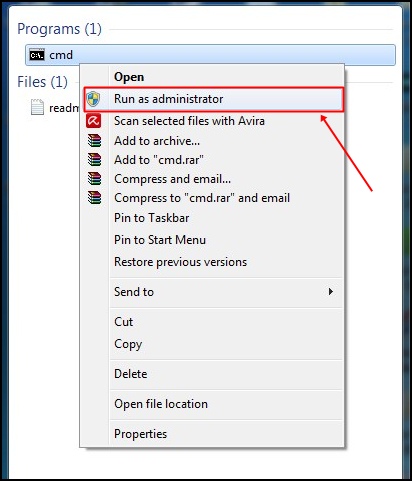
Step 1. First of all, search for “cmd” in the start menu and then right click on command prompt and then select “Run As Administrator.”
Step 2. Now in command prompt, you have to enter the command given below,
attrib -h -r -s /s /d x:*.*
where you need to replace x with the letter of your drive.
attrib -h -r -s /s /d x:*.*
where you need to replace x with the letter of your drive.
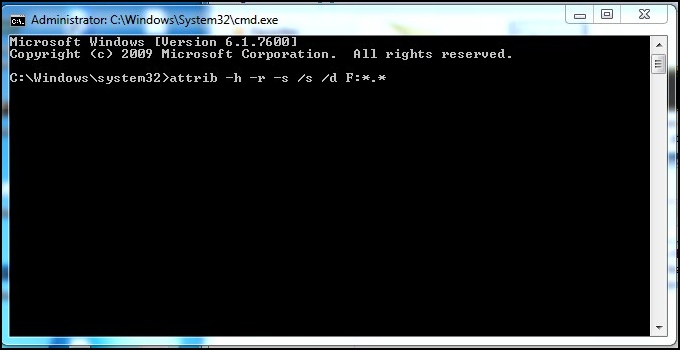
That’s it! The process will take few seconds and you are done, now open your drive in explorer, and you will see all your files present there, that is these are recovered.
# Method 4: By Searching (.) in Search Box
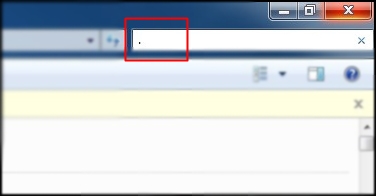
First of all, open your drive in explorer. Now you will see there no items to displayed. Just add a dot (.) in the search box at the top right corner. You can see all the hidden files and folders there, and you can easily copy that files and then paste anywhere in your computer storage as a recovered file.
Now simply format your Pendrive after recovering all the data and then put data back in it. That’s it now this problem will get permanently fixed in your USB storage.
So above is all about How to Fix Pendrive Empty Problem Even The Drive Is Full. With the above-discussed methods, you can easily recover all the files from the USB drive where you can’t view all your files, but the memory is full there. So use the above-discussed methods and fix out this issue. Hope this solution works for you, keep on sharing our tricks. Leave a comment below if you have any related queries with this.
Comments
Post a Comment